
When you are entering large amounts of data into a spreadsheet it is easy to mistype a value. One method of double-checking the data values is to simply eyeball the spreadsheet, matching the original data against what you’ve typed. A more foolproof method is to verify the data by entering it again (or getting a second person to do this) and letting Genstat compare the two sets of entries, flagging up any mismatches.
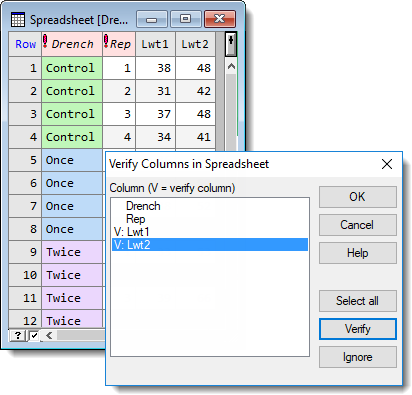
- From the menu select Spread | Sheet | Verify.
- Double-click the names of the columns to verify, which will prefix the names with V:, then click OK.
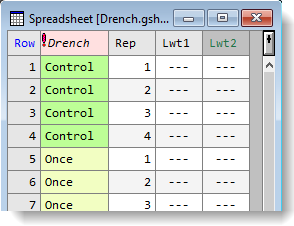
The values in your selected columns are replaced by – – -.
- Retype the first value then press Enter or use the keyboard arrow keys to move to the next cell.
- Continue retyping values. Genstat will recognize if you type any values differently to the originals and displaying the following prompt.
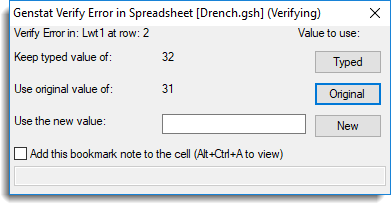
If you see the above prompt you can:
- Keep the value you just typed (click Typed).
- Use the original value in the cell (click Original)
- Enter a enter a new value then click New.
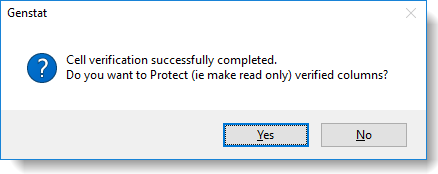
- Continue typing values until each cell has been verified, at which point the following prompt will appear. Click Yes or No as appropriate.
If any mismatches are detected Genstat creates a verification spreadsheet containing a record for each changed value.
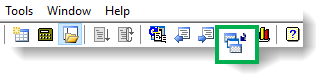
- To see this spreadsheet, from the toolbar click the Window List button.
- Select the verification spreadsheet (this will be Book; followed by a number) and click Activate.
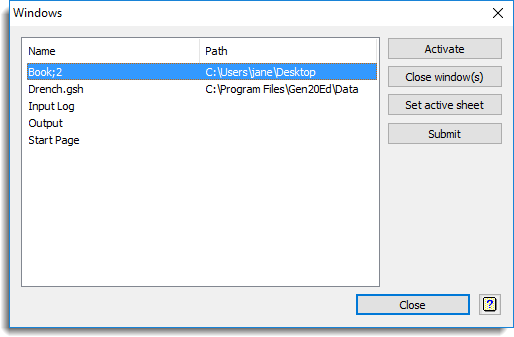
The spreadsheet shows which cells have changed. You can save this spreadsheet for your records or give it to a 3rd party if further verification is needed.

- Selecting Spread | Sheet | Verify while verification is in progress will display this dialog.
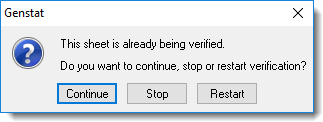
You can also cancel verification by selecting Spread | Sheet | Verify Off.