Use this dialog to edit the code sections available for insertion, or to insert one of the sections into the current text window. This menu can be opened from the second item in the pop-up menu opened with the Insert Code menu item from either the Edit menu or the right-mouse menu.
The indentation and tab options set in Text Editor options (automatic, spaces and size of tab stop) will be followed when inserting the code.
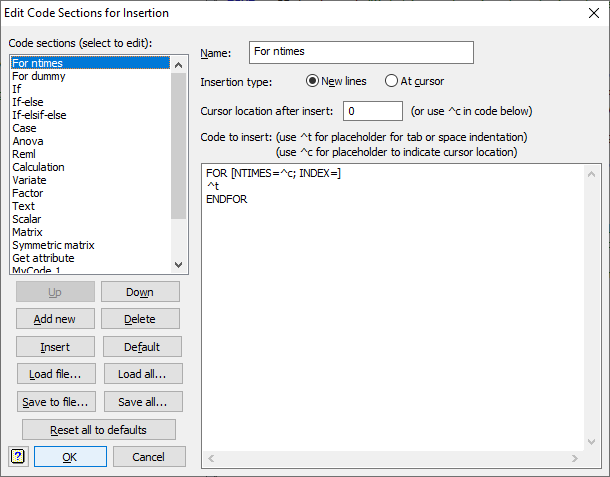
Code sections
This gives a list of the names of code sections that have been defined. Clicking on an item allows it to be edited, inserted or moved up or down, or be saved or reset to its default setting. When moving to a new item, any changes to the current item will be saved but, if there are any faults, the move will be cancelled.
Name
This is a label for a code section that will be shown in the pop-up menu. These names should be unique and a warning will be given if they are not unique. When adding a new section the default name My Code n (where n is a distinct number), will be used as a default. The name can at most be 40 characters long.
Insertion type
| New lines | The code will be added as a set of new lines before or after the current cursor position. If the cursor is at the start of a line, it will be added before the current line. Otherwise it will be added after it. |
| At cursor | The code will be inserted at the current cursor position. |
Cursor location after insert
This gives an offset from the start of the inserted text to place the cursor in the text edit window. An offset of 0 will locate the cursor at the start of the inserted text, while an offset equal to the length of the code will locate the cursor at the end of the text. However, if the code contains the placeholder ^c, this offset is ignored.
Code to insert
This is an edit window for you to type, edit or paste the code that is to be inserted. The placeholder ^t will be replaced with a tab or a number of spaces as set in the Text Editor options. The placeholder ^c specifies the location for the cursor after inserting the code. If ^c is not present, the Cursor location after insert value will be used for the cursor location. The usual windows keys for Copy, Cut and Paste (Ctrl+C, Ctrl+X, Ctrl+V) are all available in this window.
Up
Move the current code section up in the list.
Down
Move the current code section down in the list.
Add new
Add a new empty code section at the end of the list. A code section can also be added by selecting text in an text edit window and then using the Add selection to code sections item in the right mouse menu.
Delete
Delete the current code section in the list.
Insert
Insert the current code section into the text edit window.
Default
Reset the current code section to its default settings.
Load file
Load a Genstat command file (.gen) as a code section. If the command file contains a name (in a comment “Code section: <name>”) and a code section with this name already exist, you will be prompted to replace that section with the new code. Otherwise it will be added at the end of the list.
Load all
Load a Genstat code section file (.gcd) containing multiple code sections. If the code section file contains names already in the code section, you will be prompted to replace those sections with the new code. Otherwise new entries will be added at the end of the list.
Save to file
Save the current code section to a Genstat command file (.gen).
Save all
Save all the code sections to a Genstat code section file (.gcd).
Reset all to defaults
This will prompt you to reset all sections to the default sections or just the system sections to their defaults. If you reset just the system sections, then your own sections will be placed after the system sections.
See also
- Select Command for Insertion dialog.
- Build Command dialog.
- Edit menu.