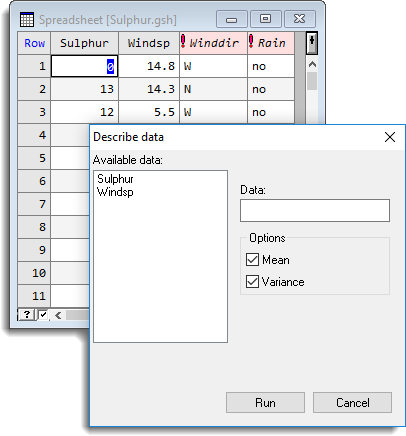
This example demonstrates how to create a custom dialog to produce some simple summary statistics of a variate. In this example we will create a dialog with the title ‘Describe data’. It will contain an available data box to display just variates, an edit control to receive the name of the identifier to be described and two check boxes to display two options to display (mean or variance). The dialog will activate the DESCRIBE procedure using the information from the dialog. The dialog produced by this example is shown below:
Resource language
The following code shows the resource language to create the dialog and its controls.
DIALOG DIALOG1,210, 170
CAPTION “Describe data”
PROCEDURE “DESCRIBE”
BEGIN
PUSHBUTTON “&Run”,IDRUN,90, 148, 54, 14,BS_RUN
PUSHBUTTON “Cancel”,IDCANCEL,148,148,54,14,BS_CANCEL
LTEXT “&Available Data:”,ITEXT,2,2,52,9
LISTBOX IDLIST,2,12,90,120,GW_AVAILABLE
LTEXT “&Data:”,ISTATIC,100,20,46,9
EDITTEXT DATA,100,30,100,14,GW_AVAILABLE | DT_TYPVAR | GW_PARAM | EC_SET
GROUPBOX “Options”, IDSTATIC, 100, 50, 100, 40
CHECKBOX “&Mean”,SELECTION,104,60,90,14,GW_OPT | GW_SEL,”mean”
CHECKBOX “&Variance”,SELECTION,104,74,90,14,GW_OPT | GW_SEL,”var”
END
To associate the check boxes with the SELECTION option of the DESCRIBE procedure, both the CHECKBOX statements are given the matching id SELECTION. Similarly, to associate the edit control with the DATA parameter the EDITTEXT statement is given the matching id called DATA. The dialog is given a run button using the BS_RUN flag. When the Run button is clicked it will form a Genstat command using the DESCRIBE procedure and submit the command to the server. The ‘&’ character is used in text for the controls to specify mnemonic characters for the dialog. To use the dialog in Genstat you must save the code to a file (preferably in an add-in folder) with the extension .grc, for example, describe.grc.
Attaching to Genstat
To attach a custom dialog menu add-in to Genstat you must supply the details within a Genstat add-in (GAD) file. The type of add-in, in this case the dialog, should be supplied using a subsection called Type. You must supply the add-in using the dialog ID used in the resource file (DIALOG_TRANSFORM) using the ProgID subsection. The name that is to appear on the User menu is supplied using the subsection MenuTitle. The name of the file containing the dialog resources (describe.grc) should be entered using the subsection ResourceFile . You must supply the full path with the resource filename, unless the resource file is contained in the same folder as the GAD file. The following example shows the layout required to attach the dialog.
[AddIn1]
Type=DIALOG
ProgID=DIALOG1
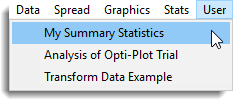
MenuTitle=My Summary Statistics
ResourceFile=describe.grc
To make the add-ins accessible from Genstat save the GAD file using the file extension .gad, for example, describe.gad. Copy the file to either the system or user add-in directory. The next time you start Genstat the custom dialog should attach automatically and the menu item to open the dialog will be found under the User menu.