This is a brief introduction to the three main stages in analysing data with Genstat. These are:
- entering data
- performing the required analysis
- saving the results.
We’ll start by creating a new spreadsheet.
- From the menu select Spread | New | Create.
This will open a dialog in which you can specify the size and type of spreadsheet.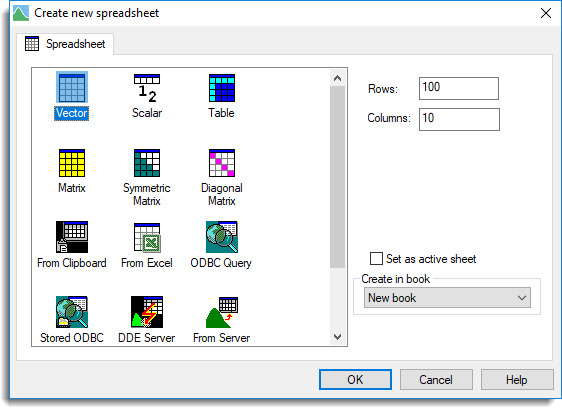
- Leave the settings at their defaults and click OK.
This will create a spreadsheet of the default size (100 rows and 10 columns). An asterisk * appears in every cell: this is how Genstat represents a missing value i.e. an unknown quantity. - To enter data in the spreadsheet click on the cell in row 1, column C1. This will be highlighted in blue, indicating that you can edit it.
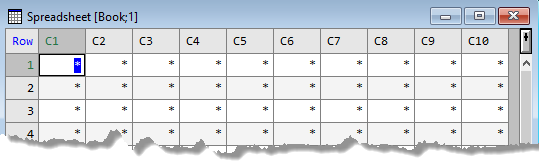
- You can now type a value: type 2 then press the down arrow on your keyboard to move to the next row down.
- Enter the following set of data in columns C1 and C2. After typing the value 12 you will need to move to the next column by clicking on row 1, column C2.
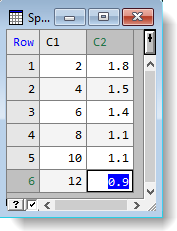
- After entering the data, remove the empty rows and columns. From the menu select Spread | Delete | Empty Rows + Columns.This will shrink the spreadsheet to the size of the data you entered.
Your data is displayed in the spreadsheet window, but cannot be accessed by Genstat until it is loaded into the Genstat server i.e. loaded into memory where Genstat can perform calculations on it.
- To load your new data click anywhere outside the spreadsheet window.
- To check that your data has loaded into the Genstat server, click the Data tab at the bottom left of the screen then double-click the All Data folder. Your new columns are listed below the folder.

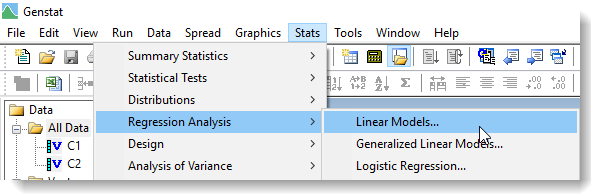
The Stats menu contains many options for performing analyses. For example, you can fit a straight line to the data that you have just entered.
- Select Stats | Regression Analysis | Linear Models.
The Linear Regression dialog (pictured below) lets you select your data and specify various other options to control the analysis.
The Available data field lists your data structures (the two columns of data you created). - Put the cursor in the Response variate (Y) field to give it focus, then double-click C1 to move it across.
- The cursor will automatically move to the next field, so double-click C2 to move it to the Explanatory variate (X) field.
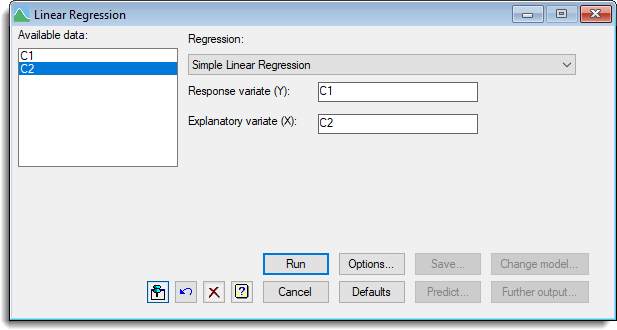
- Now click Run.
The results from the regression of C2 on C1 will appear in the Output window.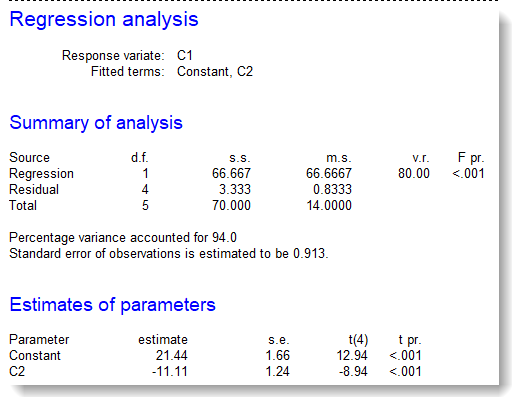
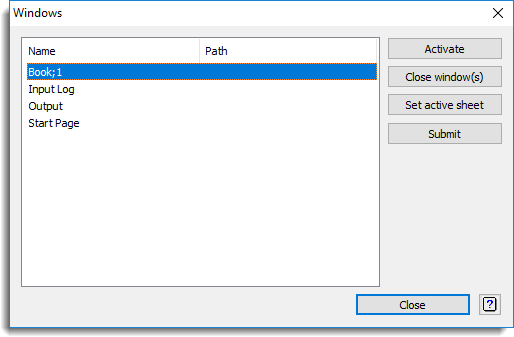
- To re-display the Linear Regression dialog, from the toolbar click the Window List button.
- The Window List displays all your open windows. Double-click Linear Regression to make it the active window.
- To produce more output from the analysis click Further output.

Here you can continue to work with your data set.
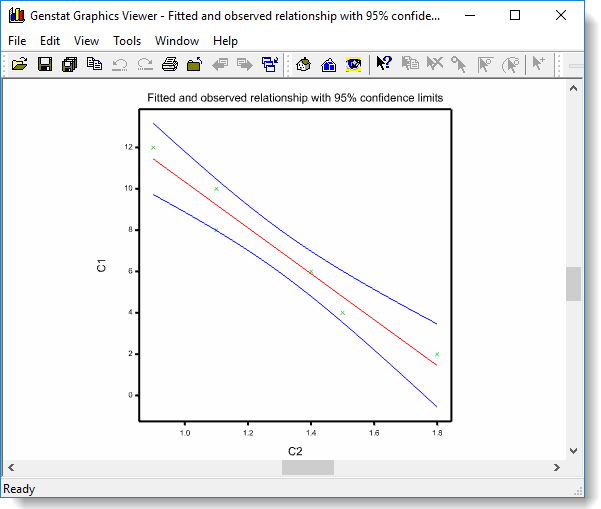
For example, clicking Fitted model will open the Genstat Graphics Viewer, which contains a graph of the fitted line.
- To close any window click the X in the top-right corner.
To save the results of the regression analysis or the spreadsheet, you need to make make one of these the ‘active’ window then use the File menu to save it.
To save the regression analysis
The results of the regression analysis are contained in the Output window.
- To make the Output window ‘active’, click anywhere inside it.
- From the menu select File | Save then specify an appropriate name for the saved output and click Save.
To save the spreadsheet
- To re-display the spreadsheet, from the toolbar click the Window List button.
- The Window List displays all your open windows. Double-click your spreadsheet Book; 1 to make it the active window.
- From the menu select File | Save then specify an appropriate name for the spreadsheet and click Save.Your spreadsheet will be saved as a .gsh file, which is Genstat’s native spreadsheet format.
- To save in a different format, such as Excel, click the Save as type list and select your required format before clicking Save.