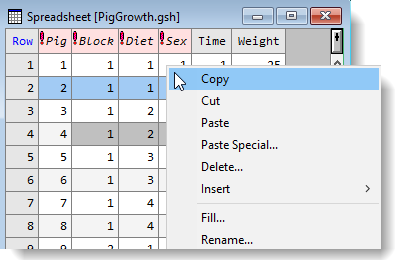
By selecting multiple cells you can copy or delete data, apply basic formatting, or perform other actions to selected cells all at once.
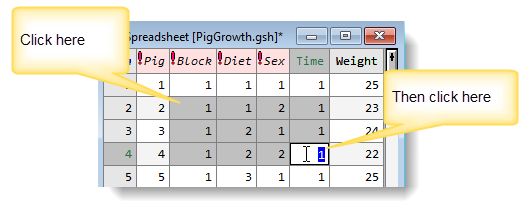
- Click the first cell in your block then drag the mouse to the last cell or hold down the Shift key and click the last cell.
Extending the selected range
- You can extend the selected range by holding down the Shift or Ctrl key and clicking more cells or pressing the arrows keys.
Removing cells from your selection
- If you accidentally select more cells than you meant to, hold down Shift and press the arrow keys to remove rows or columns.
Selecting a large range without scrolling
For very large spreadsheets it can be quicker to specify the range boundary, rather than scrolling.
- From the menu select Spread | Select | Range.
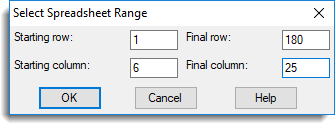
- Enter the start and end positions then click OK.
Selecting two ranges
You can select two ranges of the same or unequal size.
- To select the first range, click the first cell in the range then hold down the Shift key and click the last cell.
- Press the keyboard shortcut keys Ctrl+Alt+Q simultaneously.
This turns on cell selection mode, which allows you to click outside your selection without causing the cells to be de-selected. - Click Yes when you are prompted to confirm the cell selection.
This prevents Genstat from clearing the first range when you select the second one.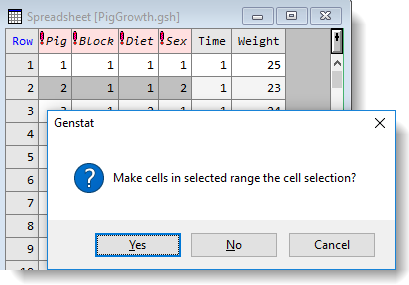
- Select the second range.
Do not left-click anywhere else within the spreadsheet as this will turn off cell selection mode, causing all your cells to be de-selected.
You can now use the right-click menu or toolbar menus to perform actions on all selected cells.