Sometimes data for separate categories or trials will have been entered into different files. If the files are identically structured (same column names, same column types of factor/text, etc.) they can be combined into a single spreadsheet. Even if columns have been named differently you can still combine files by matching the column positions (column one in the second file will be appended to column one in the first file, and so on).
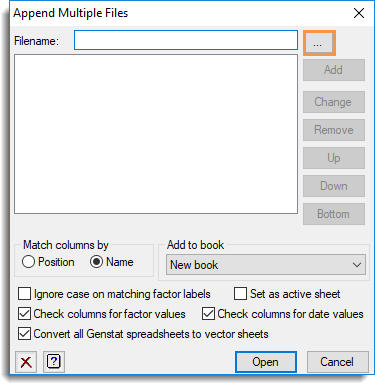
- From the menu select Spread | New | Append Multiple Files.
- To locate your first file click

- Navigate to the file location, select a file then click Open.
You can select multiple files in one action by holding Ctrl as you click the file names.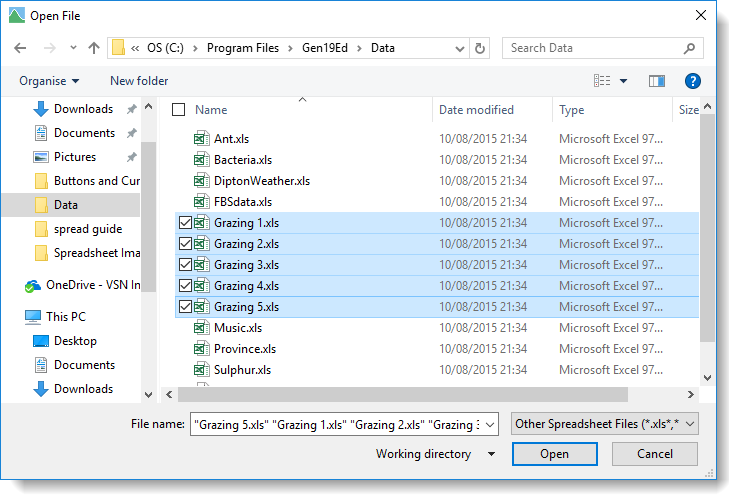
- If your files are spread across different locations click and navigate to the next file. Repeat as necessary.
The file order shown in the dialog below defines the order that the data will appear in the resulting spreadsheet.
- If you want to change this order, select a file then reorder it by clicking the buttons on the right – Up, Down, etc.
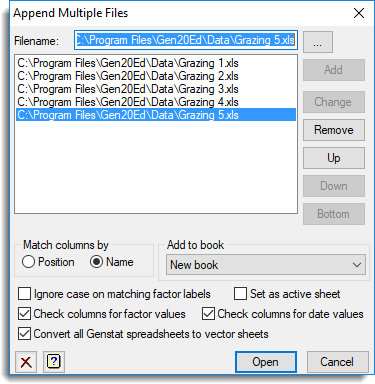
- Select a Match columns by option.
- Position – matches the spreadsheet columns by their position i.e. column one in the second spreadsheet will be appended to column one in the first spreadsheet, etc.
- Name – matches and appends spreadsheet columns that have the same name, regardless of their position.
- Set other options as required (see Appending options below) or leave them at their defaults and click Open. (The default options are normally sufficient.)
The following dialog will appear for each file that you import.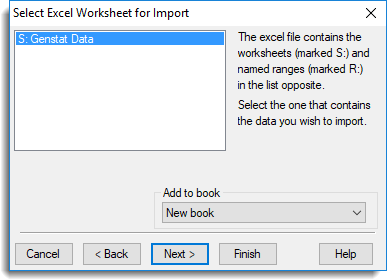
- If one of your files contains more than one spreadsheet (as shown above) select the ones you want then click Finish. Repeat for each file you are importing.
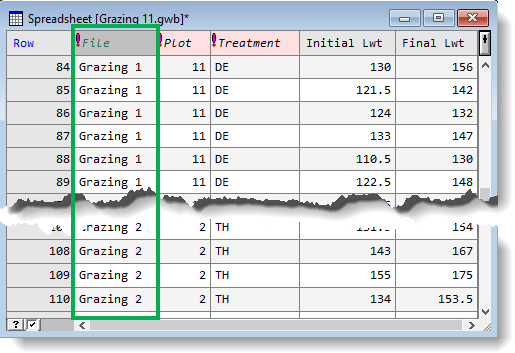
The new spreadsheet opens to display your imported data. Genstat automatically creates a new factor column called File that gives the name of the file each row came from. The following image shows a new spreadsheet where the file Grazing 2 has been appended to Grazing 1. The factor column File identifies which file each row came from. If any of your appended files contain multiple sheets the File label will contain the file name and the sheet name.
| Filename | Lets you select which files to append. For multi-paged Genstat books (GWB) or Excel files, you will be prompted for each of these files in turn to select one or more of the sheets within the file to append. The files are appended in the order that they are displayed in the list. The following buttons can be used to add, remove or change the order of the files in the list. Add – add the file in the Filename field into the list of files. Change – replace the selected the file in the list with the name in the Filename field. Remove – remove the selected file from the list. Up – move the selected file up one place in the list. Down – move the selected file down one place in the list. Bottom – move the selected file to the last place in the list. |
| Match columns by | Controls how columns are matched between spreadsheets. Position – matches the spreadsheet columns by their position i.e. column one in the second spreadsheet will be appended to column one in the first spreadsheet, etc. Name – matches and appends spreadsheet columns that have the same name, regardless of their position. |
| Add to book | Any open spreadsheets will be displayed in this dropdown list. Select a spreadsheet to append your data to or leave it at the default setting New Book to create a new workbook. |
| Ignore case on matching factor labels | If selected, Genstat will match the existing and appended labels even if they use different case e.g. AB and ab will be recognized as the same label. |
| Check columns for factor values | If selected, Genstat checks all columns to see if they contain repeated values. If columns appear to contain categorical data you will be prompted to convert these columns to factors. |
| Convert all Genstat spreadsheets to vector sheets | When appending Genstat spreadsheets (.gsh or .gwb), the spreadsheets may be in matrix or table format. You cannot necessarily append a mixture of formats, but by selecting this option, you will convert the non-vector spreadsheets to vector format so that they can be appended. The result will be a vector spreadsheet. You can however append matrices (but not symmetric or diagonal matrix types) to a matrix, and the resulting spreadsheet will be in matrix format. |
| Set as active sheet | This sets the new spreadsheet that is created as the active spreadsheet. Setting an active spreadsheet provides a method of avoiding multiple data updates to the server when more than one spreadsheet is open within Genstat. When a spreadsheet is set as the active spreadsheet only data from that spreadsheet is automatically updated to the Genstat server. Another advantage of specifying an active spreadsheet is that the Spread menu options will always be enabled even if your spreadsheet does not have the cursor focus. |
| Check columns for date values | If selected, Genstat checks all text columns to see if they contain data in date format. If any columns appear to contain dates you will be prompted to convert these to a date format. |