Merging allows you to combine data sets held in separate spreadsheets, as long as they have one column with the same name that can be used as a matching indicator to merge them together.
If you have two spreadsheets open in Genstat you can merge them together in different orders or at different levels of aggregation using the Merge menu. You can also merge data from more than two files.
Merged spreadsheets do not need to be the same file format e.g. you can merge a .csv file with an Excel or Genstat .gsh file.
Before you open the spreadsheets in Genstat ensure that each one has a column with the same name.
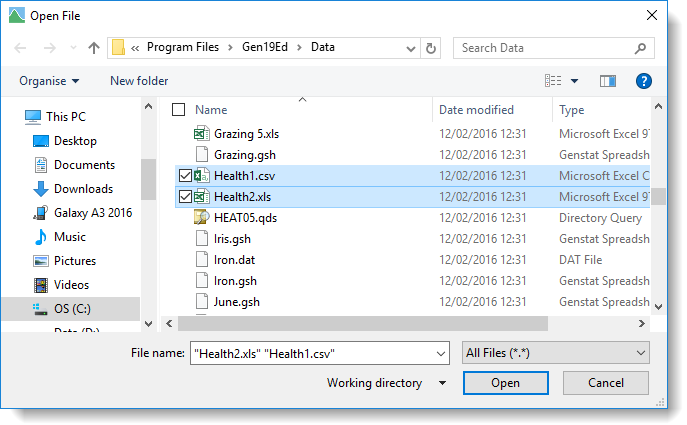
- Open the two spreadsheets you want to merge. To do this from the menu select File | Open then navigate to your spreadsheet files, select both by holding down Ctrl while clicking with the mouse, then click Open.
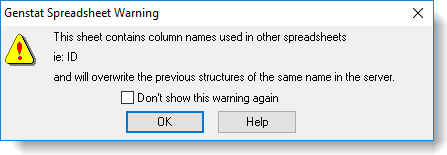
- Genstat will warn you that the second spreadsheet contains a column with the same name as a column in the first spreadsheet. This is what we want so click OK to close the prompt.
- Click anywhere in the first spreadsheet then from the menu select Spread | Manipulate | Merge. Genstat automatically puts the name of the second spreadsheet in the Merge data from sheet.
- Use Matching column and With column to select two columns of the same name.
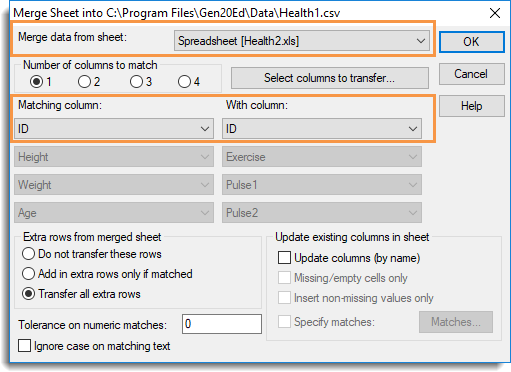
- Set options as required (see Merge options below) or accept the defaults and click OK.
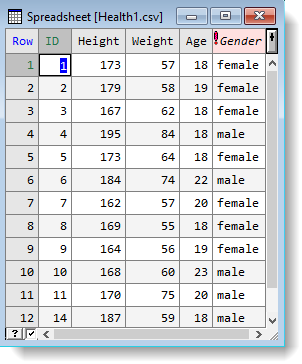
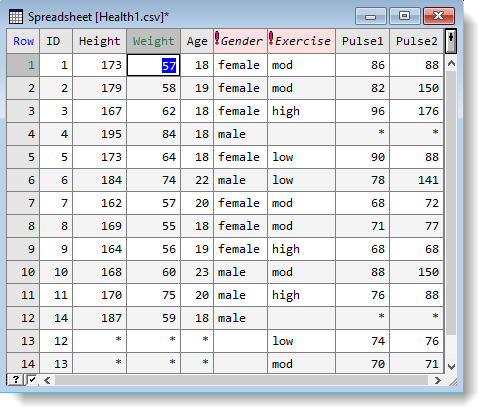
The first spreadsheet is updated with the merged data. In the images below the column ID was used as the matching column. Where an ID was found in one spreadsheet, but not the other, missing values are used to complete the rows.
 |
 |
| Spreadsheet before merge | Spreadsheet after merging |
| Merge data from sheet | Lets you select which open spreadsheet to merge data from.
|
| Select columns to transfer |
This opens a new dialog that lets you specify a subset of columns to be merged into the first spreadsheet.
|
| Extra rows from merged sheet | Lets you specify what to do with unmatched rows from the second spreadsheet.
|
| Tolerance on numeric matches |
Specifies a positive value to be used as a tolerance when comparing two numerical values. If two values differ by less than or equal to this tolerance they will be recognized as a match. Note: the value of 0 only matches identical values. Problems with apparently identical values not matching can occur when these values differ by the least significant digit, with this not being displayed, e.g. the two numbers 0.3333333333333333 and 0.3333333333333332 differ in the least significant digit, but when displayed to fewer than 16 decimal places they will appear to be equal. This problem occurs most often in calculated values, as for example the calculations 1/3 and 400/600 can give different results in the least significant bit in their binary representation. |
| Update existing columns in sheet |
|
| Specify matches | Select this to specify pairs of columns to be matched using the Matches button. |
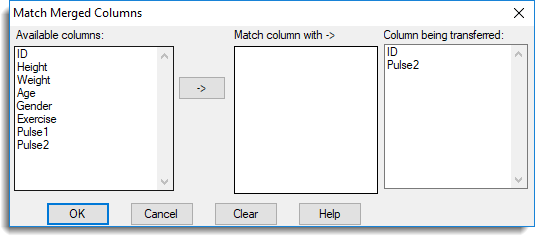
| Matches |
This opens a new dialog that lets you specify matches between columns in the two spreadsheets. Available columns contains columns from the first spreadsheet, which will have data added to it. For each column being transferred, a column from the original spreadsheet is selected. If no column in the original spreadsheet is selected, then the merged column will be added in as a new column in the current spreadsheet.
|

Before you open the spreadsheets in Genstat ensure that each one has a column with the same name.
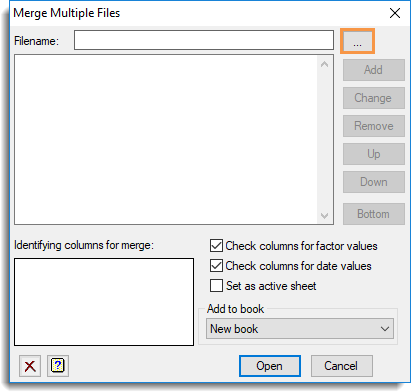
- From the menu select Spread | New | Merge Multiple Files.
- Click
 to navigate to your spreadsheet files.
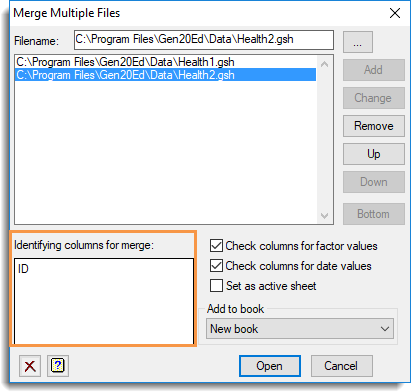
- Select each file by holding down Ctrl while clicking with the mouse, then click Open.

- In the Identifying columns for merge field, type the names of all columns you want to use to identify matching rows between spreadsheets, pressing the keyboard Enter key after each name to put it on a new line.
Each identifying column must appear in all files that are being merged. You can enter a maximum of 8 identifying columns.
- Set options as required (see Merge options below) or accept the defaults and click Open.
The spreadsheet opens to display the merged data.
| Filename |
Lets you select which files to include in the merge. For multi-paged Genstat books (GWB) or Excel files, you will be prompted for each of these files in turn to select one or more of the sheets within the file to merge.
|
| Identifying columns for merge | Lets you specify the names of all columns you want to use to identify matching rows between spreadsheets. Each name must appear on a separate row. Each identifying column must appear in all files that are being merged. You can enter a maximum of 8 identifying columns. |
| Check columns for factor values | If selected, Genstat checks all columns to see if they contain repeated values. If columns appear to contain categorical data you will be prompted to convert these to factors. |
| Check columns for date values | If selected, Genstat checks all text columns to see if they contain data in date format. If any columns appear to contain dates you will be prompted to convert these to a date format. |
| Set as active sheet |
This sets the new spreadsheet that is created as the active spreadsheet. Setting an active spreadsheet provides a method of avoiding multiple data updates to the server when more than one spreadsheet is open within Genstat. When a spreadsheet is set as the active spreadsheet only data from that spreadsheet is automatically updated to the Genstat server. Another advantage of specifying an active spreadsheet is that the Spread menu options will always be enabled even if your spreadsheet does not have the cursor focus. |
| Add to book | Any open spreadsheets will be displayed in this dropdown list. Select a spreadsheet to merge your data with or leave it at the default setting New Book to create a new workbook. |