A spreadsheet can be split into one or more subsets, with each subset being placed into its own spreadsheet. For example, you can select a set of rows and split these into their own sheet, specify a value above or below which to split, or create a subset from the levels of a factor, among other methods.
 |
 |
| Subset by column value | Subset by random sampling |
- From the menu select Spread | Manipulate | Split/Subset.
- Select whether to split the subset into multiple sheets or a single spreadsheet.
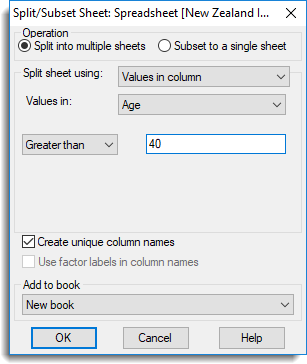
- From the Split sheet using dropdown list, specify a criterion for the split.
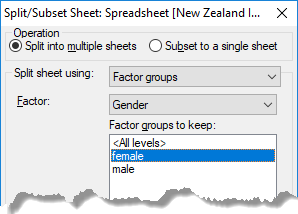
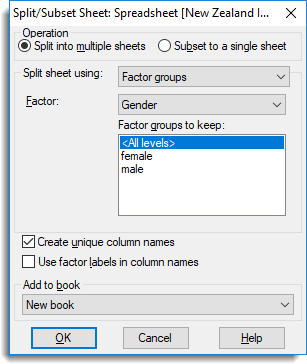
In the image above, two new spreadsheets will be formed based on the Gender column from the spreadsheet below: one will contain only rows where Gender = female, and the other will contain only rows where Gender = male.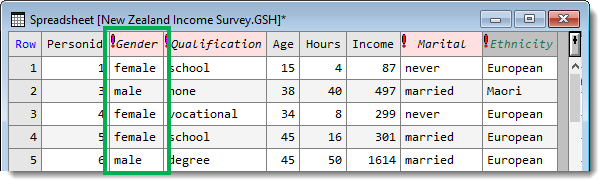
- Set other options as required then click OK.
| Operation |
Split into multiple sheets – Forms a new spreadsheet from the specified rows, and a second spreadsheet from the remaining rows. If you select Factor groups as the Split sheet using method, each factor level will be put into its own spreadsheet; if you then select any Factor groups to keep only the selected groups will have a spreadsheet formed for them. Subset to a single sheet – Forms a new spreadsheet from the specified rows. |
| Split sheet |
Factor groups – Specify a factor to use to split the rows. If the spreadsheet contains no factors then this item will not be available.
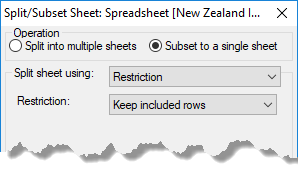
Restriction – The current restriction/filter is used to define the rows that are placed into the two spreadsheets, if splitting. The included rows are placed in the first spreadsheet and the excluded rows into the second. If subsetting, the Keep included rows option will take the included rows for the subset, and the Keep excluded rows option will take the excluded rows. This item is only available if the spreadsheet has a restriction/filter currently defined.
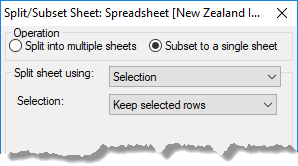
Selection – The current row selection is used to define the rows that are placed into the two spreadsheets. If splitting, the selected rows are placed in the first spreadsheet and the unselected rows into the second. If subsetting, the Keep selected rows option use the selected rows for the subset, and the Keep unselected rows option will use the unselected rows. This item is only available if you pre-selected one or more spreadsheet rows.
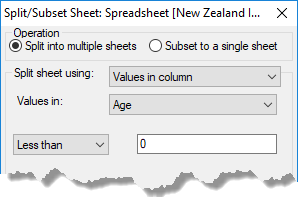
Values in a column – The Values in dropdown list specifies a column whose values are used to split the rows. You can specify a comparison of Equal to, Less than or Greater than. The value to compare with is specified in the field following the comparison operator. For the Equal to comparison, multiple values may be given in a comma or space separated list (e.g. 1,2,5,8). If subsetting, rows that satisfy the criterion will appear in the new sheet, and if splitting, the unselected rows will be placed in a second spreadsheet.
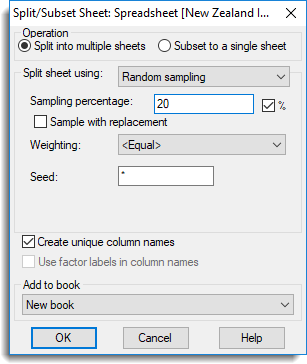
Random sampling – A random selection of rows will be selected for the new spreadsheet. If splitting, any row not selected in the random sample will appear in the second spreadsheet. The Number of samples field specifies how many random samples will be used. The value can be interpreted as a percentage of the number of rows in the spreadsheet by selecting the % option. If the Sample with replacement option is selected, then at each random selection of a row, all the available rows are eligible, otherwise only rows not yet selected are eligible for selection. If a column in the Weighting dropdown list is selected, then the values in the selected column will be used in a weighted random sample. Rows with a weight value ≤ 0 or missing will not be included in the random sample. The Seed field defines an integer value that will be used to start the randomization. If a value of * is given for the seed, a value from the computer’s clock will be used for the seed. If sampling without replacement is used, then the number of samples must be less than the number or rows in the spreadsheet (or < 100%).
|
| Create unique column names | Columns in each spreadsheet will have new names generated for them so that they are unique. If not selected, the columns will have the same names as the original spreadsheet. |
| Use factor labels in column names | If splitting the spreadsheet using Factor groups, and Create unique column names is selected, then the names of the factor groups will be used in creating the new unique column names, rather than the default of appending _1, _2, etc, to the original column name. For example, if the factor labels are ‘One’, ‘Two’, ‘Three’, then a column X would generate new column names of X_One, X_Two, and X_Three. |
| Add to book | Any open spreadsheets will be displayed in this dropdown list. Select a spreadsheet to insert your data into or leave it at the default setting New book to create new spreadsheets. |