After opening a GRIB2 meteorological data file from the File | Open menu, you can use this dialog to select the data records to read into the spreadsheet. If you do not have the WGrib2.exe software installed, then the Download WGrib software dialog will first appear to allow you to download the software.
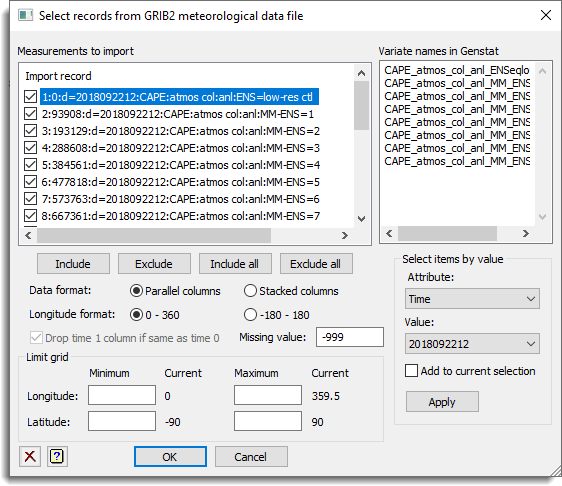
Measurements to import
This list displays the records that are available in the data. Double clicking a record or ticking its selection box will select it for reading in. The buttons below this list will also change the selection for items.
| Include | Change the status of selected records in the measurements list to ticked. Multiple records can be selected using the mouse and the Ctrl or Shift keys. |
| Exclude | Change the status of selected records in the measurements list to unticked. Multiple records can be selected using the mouse and the Ctrl or Shift keys. |
| Include all | Change the status of all records in the measurements list to ticked. |
| Exclude all | Change the status of all records in the measurements list to unticked. |
Data format
This controls how the data is arranged in the spreadsheet.
| Parallel columns | Each record is read into its own column. |
| Stacked columns | All the measurement data is read into a single column with factor columns Time0, Time1, Variable and Level indexing the items in this. |
The columns Latitude and Longitude are created for both formats. Note: the parallel data format is faster to read in and uses less memory.
Longitude format
This controls how longitude is represented.
| 0 – 360 | Longitudes are mapped into the range 0 to 360 degrees. |
| -180 – 180 | Longitudes are mapped into the range -180 to 180 degrees. |
Latitudes are always in the range -90 to 90.
Drop time 1 column if the same as time 0
The two columns time 0 and time 1 give the start and end of the period that measurement is over. So with rainfall this is the accumulation period, and with averages this gives the period the average is over. With measurements taken at a single point in time such as temperature or pressure, the two times are the same and the Time 1 column can be dropped as it provides no further information. If this item is ticked, then Time 1 is dropped if it is the same as Time 0.
Variable names in Genstat
If the Parallel columns setting of the Data format option has been selected, this list gives the column names that will be used in the spreadsheet, otherwise it will give the single name of the column for the measurements. A default name will be created, when a record is first selected, but this can be edited. There should be one line for each record selected, when in parallel format.
Limit grid
The four fields for the Minimum and Maximum Longitude and Latitude can be specified to subset the data to those which lie inside the specified grid. The Current values give the minimum and maximum values that are in the data file. These value must lie within the range given by the current values.
Select items by value
This gives the attribute variables found in the GRIB2 file in the Attribute dropdown list. When you select an attribute from the list the range of values of this attribute are put in the Value dropdown list. Selecting an attribute and value and then clicking the Apply button will select all items in the list with that attribute. For example, this could be used to select all temperature measurements in a data file.
See also
File menu for handling files.
Download WGrib software
GRIBIMPORT procedure
File formats supported by Genstat
Supported data file formats for a full listing of the data and spreadsheet file formats that Genstat can import or export.