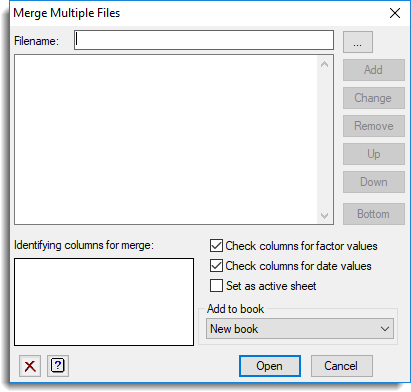
Select menu: Spread | New | Merge Multiple Files
Use this to merge data from multiple files from different file formats into a single spreadsheet. Data rows are matched between the files using identifying columns that are present in each of the files. On merging the files any additional columns that are not used to identify a match are added to the end of the newly created spreadsheet in turn using the row order of the initial file. If any of these columns share the same name between files, the subsequent column names will be changed to make a unique name.
- After you have imported your data, from the menu select
Spread | New | Merge Multiple Files.
Filename
The name of a file that is to be included in the merge. You can type in the name of a file including its full path directly. Alternatively, you can browse for a file by clicking the ![]() button. Files that are selected using the Browse dialog will be added to the list of filenames automatically. However, if you type in the filename directly the Add button should be used to add the filename to the list of files to be merged.
button. Files that are selected using the Browse dialog will be added to the list of filenames automatically. However, if you type in the filename directly the Add button should be used to add the filename to the list of files to be merged.
Multiple files can be selected using the Browse dialog by selecting one or more files using the Ctrl or Shift keys. For multi-paged Genstat books (GWB) or Excel files, you will be prompted for each of these files in turn to select one or more of the sheets within the file to merge. Note that if a Genstat book only contains one sheet no prompt will appear.
The files are merged in the order that they are displayed in the list. The following buttons can be used to add, remove or change the order of the files in the merge list.
| Add | Add the filename in the Filename field into the list of files. |
| Change | Replace the selected the filename in the list with the name in the Filename field. |
| Remove | Remove the selected filename(s) from the list. |
| Up | Move the selected filename up once place in the list. |
| Down | Move the selected filename down once place in the list. |
| Bottom | Move the selected filename to the last place in the list. |
Identifying columns for merge
This list lets you specify the names of the columns to use to identify the matching rows between the files. Each identifying column must appear in all the files that are being merged. Type the column names into this field; each column name must appear on a separate row in the list. A maximum of 8 column names can be supplied.
Check columns for factor values
When selected, Genstat checks all columns to see if they contain repeated values. If columns appear to contain categorical data you are prompted to convert these to factors.
Check columns for date values
When selected, Genstat checks all text columns to see if they contain data in date format. If any columns appear to contain data in date format you are prompted to convert these to a date format.
Set as active sheet
This sets the new spreadsheet that is created as the Active spreadsheet.
Add to book
This lists all open books within Genstat. Select the book that the new sheet will be added to. If the data are to appear in a new book then select the New Book setting.
Example
The dialog shown below has been opened using the browse button
![]() . It shows a number of Genstat Spreadsheet (GSH) files that have been selected to be merged into a single spreadsheet. Clicking Open on this dialog
. It shows a number of Genstat Spreadsheet (GSH) files that have been selected to be merged into a single spreadsheet. Clicking Open on this dialog
copies the file names into the file list, as shown below.
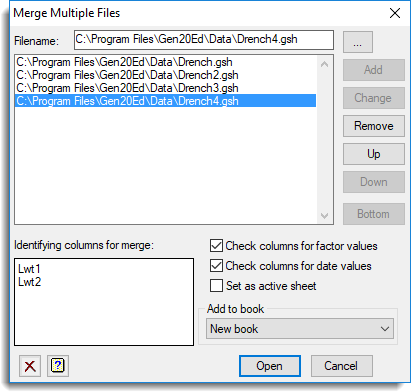
Clicking Open on the above dialog will merge the files into
a single spreadsheet. The files are merged in the spreadsheet in order they
appear in the list. When selecting multiple files you can use the Up
and Down buttons to rearrange the order that the files
will be merged in.
See also
- Spreadsheet New Menu
- Merge Spreadsheet
- Append Multiple Files
- Append Multiple Worksheets from an Excel file
- Append Data to a Spreadsheet
- Spreadsheet Manipulate Menu
- Excel Import Wizard
The JOIN procedure can be used in the command language to merge data sets.